Using Shippo
Printing Labels
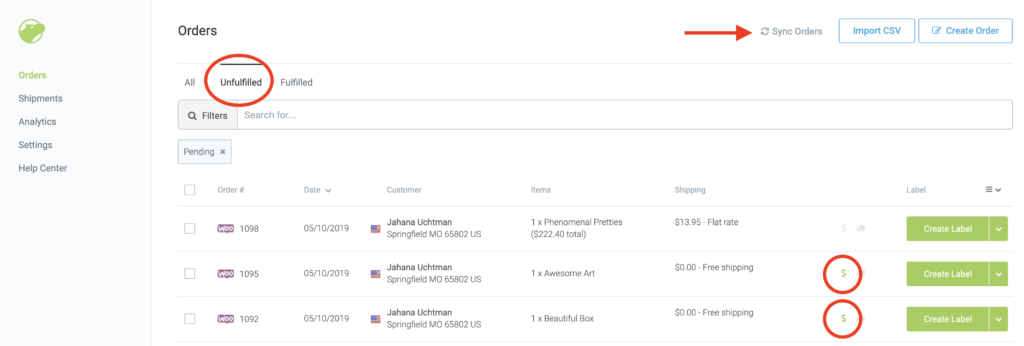
1. Login to Shippo and make sure “Orders is selected
2. Click the “Sync Orders” button to be sure all orders have been imported from WordPress
3. Click on “Unfulfilled” to see the orders that need to be shipped.
4. Make sure that the order has been paid for by checking the green dollar sign. Only create labels for paid orders.
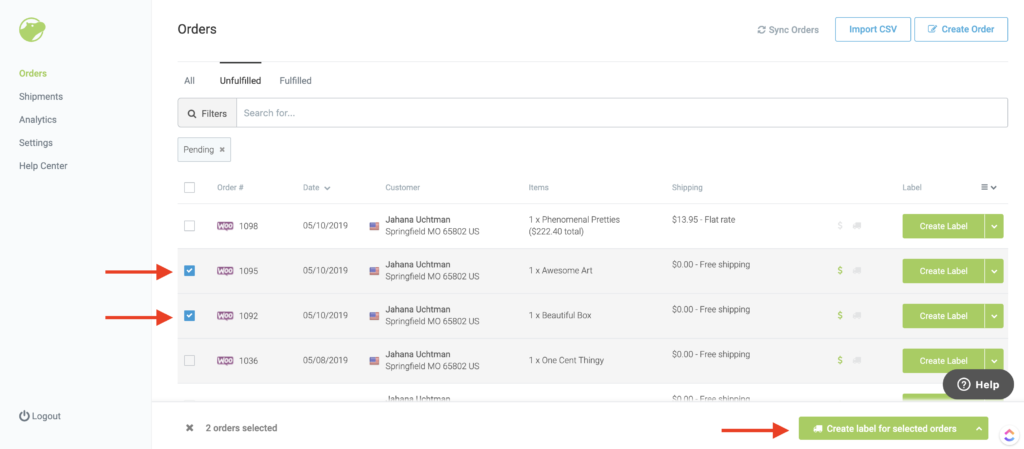
5. If all of your boxes will be the same size, click the check boxes next to the orders you want to print labels for. Then, instead of selecting the “Create Label” box on the right, choose the “Create label for selected orders” on the bottom right. This is how you process them in bulk.
OR
If all of your packages have different shipping specifications, select “Create Label” by each individual order.
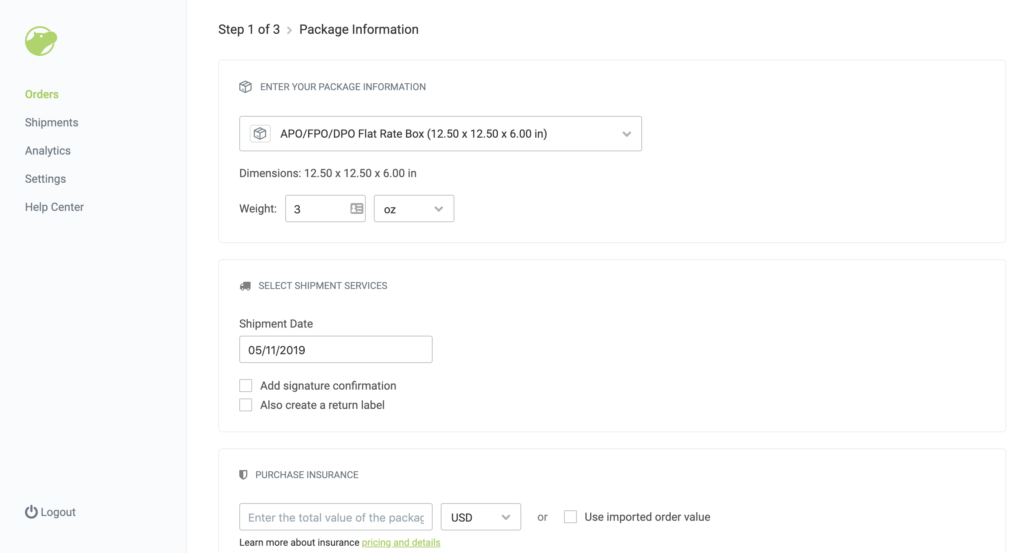
6. Set the package information. Select a template, flat rate box, or any other settings for your package. Set a shipment date, and add insurance if required.
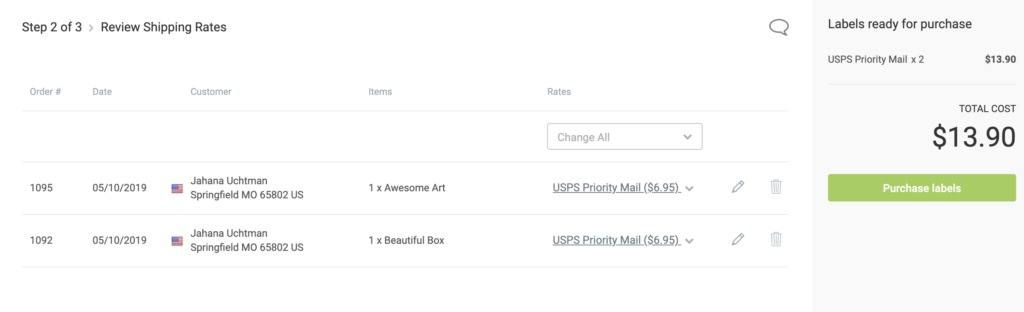
7. Review Your rates and purchase labels.
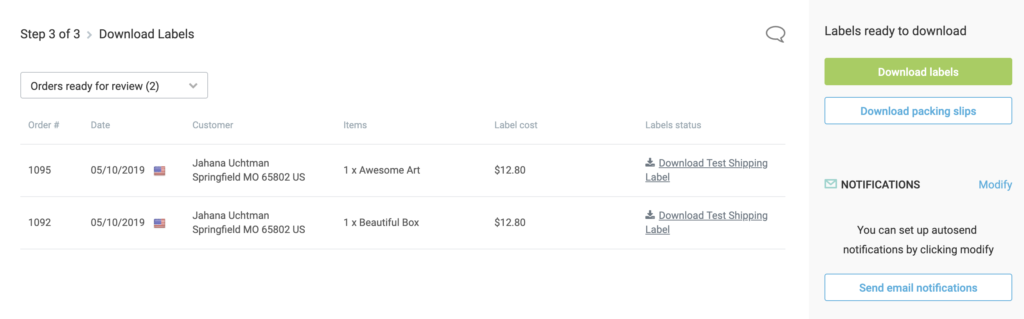
8. Once your labels have been purchased, click “Download labels” and print.
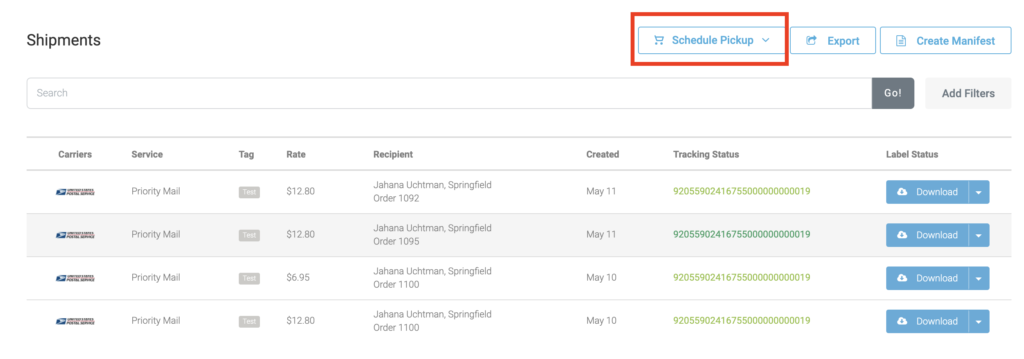
9. Schedule a pickup if you desire.
Once you purchase shipping, your customer will be sent an email with the tracking number. They can view their tracking on the Shippo platform at any time.